When I was about halfway through a project of making 47 patch cables by hand, a friend pointed out that patch cables can be bought for less than a dollar each on various web sites. This post, therefore, is probably not very useful anymore...but it may come in handy if you ever have a few stray network cables that need to be a different length, or an RJ-45 connector gets damaged.
You will need the following supplies.
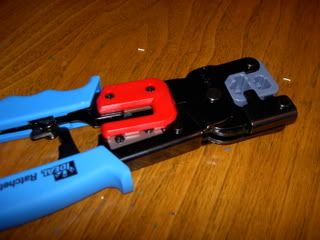
First, use the cutting side of the crimper to cut away about an inch of shielding from the wires. This will take some practice to figure out how deep to go without damaging any wires. You will probably have to start over several times before you get it right.

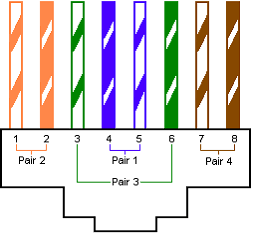
Next, untwist the wire pairs and bend them into the right order, as shown in the diagram below.
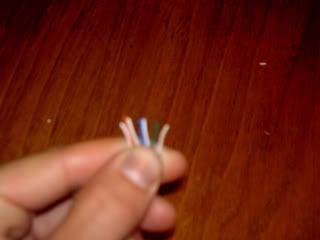
If necessary, use the cutting side of the crimper to snip the ends of the wires so that they are equal in length.

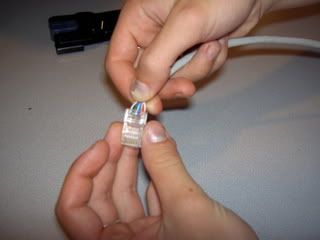
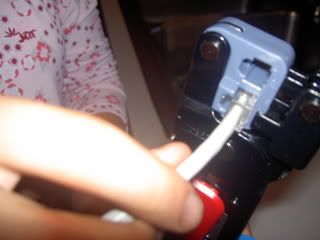
Take an RJ-45 connector (with the latch facing down) and insert the wires inside, pushing them firmly to the very end of the connector. Make sure that they stay in the proper color order and that every single wire goes to the very end of the connector. This is much more difficult than it looks at first, and takes precision and attention to detail.
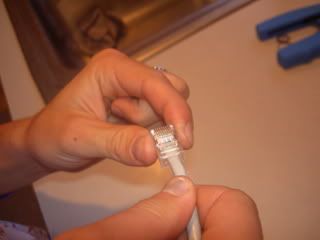
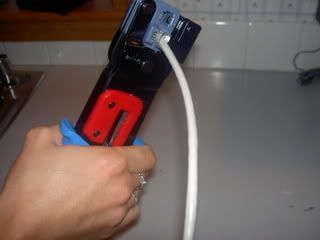
When you are sure that the wires are firmly in order and in place, press the connector into the slot on the crimper, and squeeze the handles together until there is a clear "click".
Release. Remove the cable from the crimper.
When you have finished both ends of the cable, use the cable tester as shown in picture to determine whether you were successful or not.
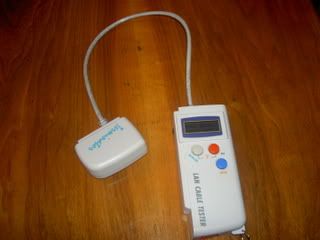
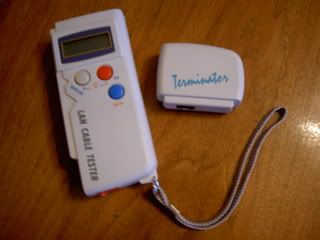
Press "enter" and watch the screen. The numbers 1,2,3,4,5,6,7,8 should line up with each other. If you accidentally crossed any wires, the numbers will not line up correctly and the cable tester will display an unknown cable type. If they line up correctly, you have made a network cable that is ready for use!
You will need the following supplies.
A crimper

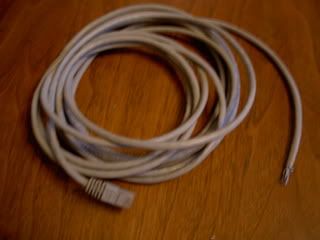
One or more CAT5 or CAT5e network cables

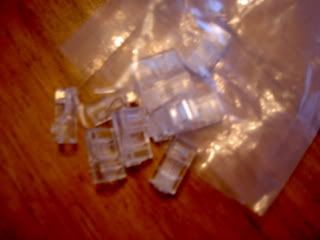
A bunch of RJ-45 connectors

A cable tester

Lots of patience!!!
First, use the cutting side of the crimper to cut away about an inch of shielding from the wires. This will take some practice to figure out how deep to go without damaging any wires. You will probably have to start over several times before you get it right.

Next, untwist the wire pairs and bend them into the right order, as shown in the diagram below.


If necessary, use the cutting side of the crimper to snip the ends of the wires so that they are equal in length.

Take an RJ-45 connector (with the latch facing down) and insert the wires inside, pushing them firmly to the very end of the connector. Make sure that they stay in the proper color order and that every single wire goes to the very end of the connector. This is much more difficult than it looks at first, and takes precision and attention to detail.


When you are sure that the wires are firmly in order and in place, press the connector into the slot on the crimper, and squeeze the handles together until there is a clear "click".


Release. Remove the cable from the crimper.
When you have finished both ends of the cable, use the cable tester as shown in picture to determine whether you were successful or not.

Press "enter" and watch the screen. The numbers 1,2,3,4,5,6,7,8 should line up with each other. If you accidentally crossed any wires, the numbers will not line up correctly and the cable tester will display an unknown cable type. If they line up correctly, you have made a network cable that is ready for use!