Monday, December 8, 2008

It Really Works!

I was exasperated with Vista and how slow it was running. I kept reading that changing themes would help performance, but I didn't want to give up the cool Aero features (switch between windows, thumbnail previews on taskbar, cool graphics, etc).

Today, I gave it a try. I changed from Windows Vista Aero theme to Windows Vista Classic theme. It isn't pretty--in fact, it reminds me of Windows 2000. But immediately, I noticed a drastic difference in speed. I think I'm sold on it.

To change your Vista theme, right click the desktop and select "Personalize." Click "Theme." Select desired theme from available drop-down menu.

Saturday, October 18, 2008

Windows Vista: A Few Good Things

I've had Vista on my personal laptop for over a month now. After upgrading to Vista Business and tweaking a few preferences, I've found that I can tolerate the operating system enough to where I'm not tempted to take a baseball bat to my monitor every twenty minutes. In hopes of encouraging those who are also stuck with Vista, I thought I'd highlight a few of its advantages over XP.

Taskbar thumbnail previews

This is a pretty cool feature. If you have the Vista Aero theme selected, hovering over any items on your taskbar reveals a real-time thumbnail preview. See example. Note that there is software that can be installed on XP to implement a similar feature.


Volume mixer

I have to say, this is a pretty sweet deal...and definitely an improvement with the Vista OS. Users can set different volume levels for every single program running. Maybe you want to hear your YouTube movie, playing in an open browser, and while you do, you don't want Outlook bothering you with the "New Mail" sound. Just single click on the volume button in the notification area of your taskbar, click the "Mixer" hyperlink, and specify the volume level for each program currently in use.


Start menu search box

The search box in the bottom of the start menu is very handy as well. You can choose to have it only search programs in your start menu, or even search all documents and files on your computer. Of course, there is a basic desktop search program that can be installed on XP...but it is handy to have it in the bottom of the start menu, and automatically included in the operating system.


Friday, October 3, 2008

Two Tips

School has me super occupied right now, and posting on this blog hasn't been at the top of my priority list. So here are just a couple of random tips for your reading pleasure.

Looking for quality screen capture software? The Jing Project is a free download that I have been consistently using for school assignments. Easily capture screen activity for the whole desktop or just a selected area or specific window, and instantly upload it to your personal library (also free) at Screencast. Making a screen capture video of a specific process or system feature can be an excellent way to show someone how it's done. For the non-techy, watching a step-by-step video is usually easier to understand than following written directions. Download Jing, create a Screencast account, and you're good to go!

Googling information pertaining to Linux? Frustrated by all the unrelated results? Refine your search before you've even entered keywords by going to www.google.com/linux. All results will be specific to Linux, and you'll have far less irrelevant sites to wade through. (Go to www.google.com/microsoft to receive Windows-specific results.)

Wednesday, September 24, 2008

My Battle With Vista

Alright...well since you are all simply GLUED to this exciting, informative, and revolutionary blog, you've been waiting for over a week now to hear about creating a system restore point, right? (Yeah...in case you haven't caught on yet, that was a joke.) Well I hate to disappoint you, but I'm not going to write about the promised System Restore Point yet. It'll come eventually, I promise. But for right now, I'm going to post a few thoughts pertaining to the hectic roller-coaster ride I've had in the technological realm the past two days.

I bought a beautiful new HP Pavilion laptop. As far as the hardware goes, I love it. 4 GB RAM, a nice big hard drive, a core 2 duo processor...much more than my current use requires. The only problem? Windows Vista Home Premium. And yes, that's a definite problem.

I knew I would run into driver issues trying to install XP Pro, but I didn't know I'd encounter them during the installation process. I tried numerous tricks to fool Vista into letting me wipe it out for XP, but to no avail. After a lot of research and a lot of experimenting, I seem to be stuck with Vista. Permanently. And that pretty much stinks.

I ended up reverting my laptop to its original factory state. That meant I also had to optimize it on my own...basically remove all the junk it comes with as a new install.

As I began to make the best of Vista and prepare my laptop for school, I ran into some other problems I didn't know Vista had. (Besides being a resource hog, bugging me with constant pop-up boxes, and sticking things in out-of-the-way and irrational locations.)

1. The built-in administrator account is disabled by default in Vista. And given my specific scenario, that turned out to be a real pain.

2. You can't even get to a lot of the computer management tools in Home Premium. You have to upgrade to Vista Business or better in order to perform basic management tasks.

I am now in search of a Vista Business CD so that I can upgrade. I have a legal key for it, I just need the corresponding media. Given the hours I've spent with Vista and its wonderful little quirks these past couple days, I will probably be posting more Vista-specific articles in the near future. Stay tuned to find out more about working with this problematic operating system.

Tuesday, September 9, 2008

Closing Your Laptop: What Happens

Ever wished you could keep your laptop from going into standby mode when you close the lid? Well, you can. Here's how to control what shutting your laptop does, in Windows Vista.

1. Click on the Start button, and click on "Control Panel" to open it.

2. Click on the "Mobile PC" hyperlink.

3. Click "Power Options."


4. Click the "Choose what closing the lid does" hyperlink in the left sidebar.


5. Choose what you want your laptop to do when you close the lid, depending on whether you are running on battery or are plugged in. The options are Do Nothing, Sleep (stand by), Hibernate, or Shut Down.


My personal preference is to "do nothing" when I'm plugged in. This way I can close my laptop and still listen to the music I have playing, remain signed in to any chat engines, and hear system notification sounds. Note that from this dialog box, you can also specify what action the laptop takes when you press the Power or Sleep buttons.

Here's a very low resolution video of this easy process.


Friday, September 5, 2008

Bypassing Vista's Confirmation Messages

One of the major complaints about the Windows Vista operating system is against the constant dialog boxes that pop up asking if you want to continue. Unless you're unsure with the cursor and have a propensity for clicking the wrong buttons, this "helpful" little feature is irksome and slows people down. The average user probably doesn't realize how easy it is to disable this feature, which is called "User Account Control." Here's how you can bypass all those irritating boxes that pop up just when you least want to see them.

1. Click the Start button, and click "Control Panel" to open it.

2. In the Control Panel Home (check left pane to make sure you are not in classic view), click on the "User Accounts and Family Safety" hyperlink.


3. Click on the "User Accounts" hyperlink.


4. Click on the "Turn User Account control on or off" hyperlink.

Photobucket


5. Uncheck the box to disable User Account Control.

Wednesday, September 3, 2008

Tech Gap

A fellow computer geek, classmate, and friend of mine has an interesting and informative blog that he updates regularly. He is great at bringing insight to a wide variety of techy topics. Check it out here!

Tuesday, September 2, 2008

Changing Computer Name (Vista)

This is for the non-techy...ever wanted to give your computer a unique name? Many users never experience times when computer name means anything, but it does pop up occasionally, such as when the computer is part of a local workgroup. In situations like this, it is fun, and sometimes helpful, to have a memorable and unique computer name.

To change your computer's name in the Windows Vista operating system, follow these few simple steps.

1. Click the Start button, right click "Computer" in the right pane, and click "Properties."

2. Under Tasks in the left pane, click the "Advanced System Settings" hyperlink. The System Properties dialog box opens.


3. Click the "Computer Name" tab.

4. Click the "Change" button.


5. Enter the desired computer name in the box, and click "Okay". You will be prompted to restart your computer for changes to take effect.

Note: To accomplish the same task in Windows XP, click "Start," right click "My Computer," click "Properties," click the "Computer Name" tab.

Friday, August 29, 2008

Making Network Cables Using a Crimper

When I was about halfway through a project of making 47 patch cables by hand, a friend pointed out that patch cables can be bought for less than a dollar each on various web sites. This post, therefore, is probably not very useful anymore...but it may come in handy if you ever have a few stray network cables that need to be a different length, or an RJ-45 connector gets damaged.

You will need the following supplies.

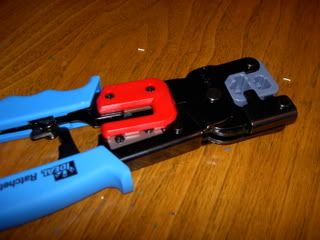
A crimper

Photobucket


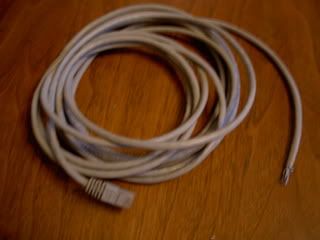
One or more CAT5 or CAT5e network cables

Photobucket


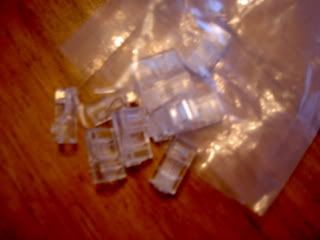
A bunch of RJ-45 connectors

Photobucket


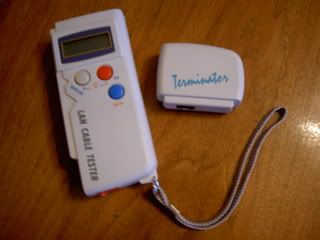
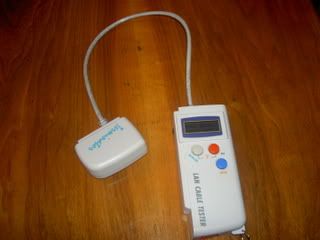
A cable tester

Photobucket


Lots of patience!!!


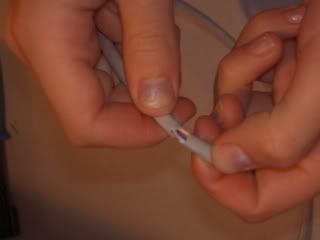
First, use the cutting side of the crimper to cut away about an inch of shielding from the wires. This will take some practice to figure out how deep to go without damaging any wires. You will probably have to start over several times before you get it right.

Photobucket

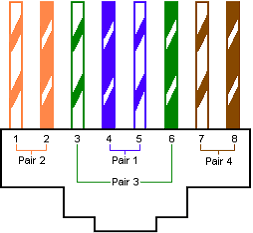
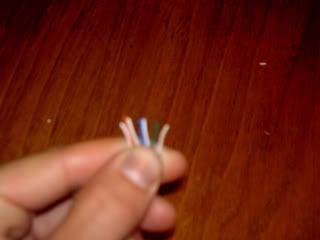
Next, untwist the wire pairs and bend them into the right order, as shown in the diagram below.

Photobucket

Photobucket

If necessary, use the cutting side of the crimper to snip the ends of the wires so that they are equal in length.

Photobucket

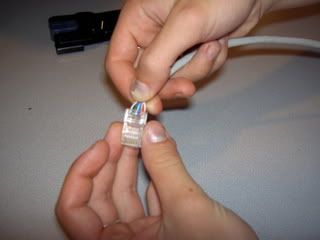
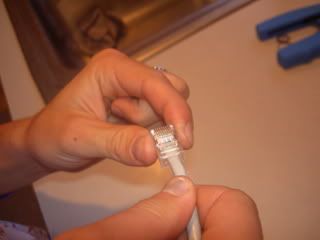
Take an RJ-45 connector (with the latch facing down) and insert the wires inside, pushing them firmly to the very end of the connector. Make sure that they stay in the proper color order and that every single wire goes to the very end of the connector. This is much more difficult than it looks at first, and takes precision and attention to detail.

Photobucket

Photobucket

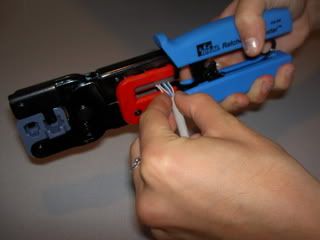
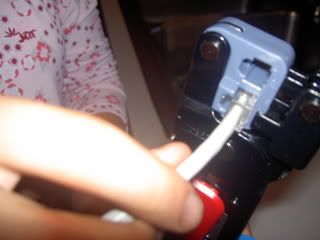
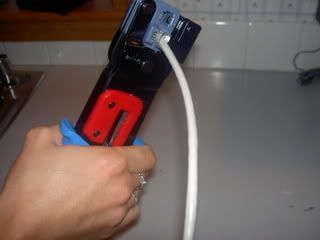
When you are sure that the wires are firmly in order and in place, press the connector into the slot on the crimper, and squeeze the handles together until there is a clear "click".

Photobucket

Photobucket

Release. Remove the cable from the crimper.

When you have finished both ends of the cable, use the cable tester as shown in picture to determine whether you were successful or not.

Photobucket


Press "enter" and watch the screen. The numbers 1,2,3,4,5,6,7,8 should line up with each other. If you accidentally crossed any wires, the numbers will not line up correctly and the cable tester will display an unknown cable type. If they line up correctly, you have made a network cable that is ready for use!

Saturday, August 23, 2008

Using Sysprep & Clonezilla

What is Sysprep?

Sysprep is a utility included with the Windows XP operating system that prepares the computer so that when it is restarted, it will execute what is called mini-setup. Depending on the settings you choose during Sysprep (see instructions below), mini-setup will ask you various questions about the installation, allowing you to customize specifics such as computer name, administrator password, and time zone.

Why use Sysprep?

Sysprep is ideal for use in the business environment, when multiple computers (with identical hardware) need the same software installed on them. Instead of repeating the same configuration and software installations on every individual computer, this can be done just on one source computer. Then you can run Sysprep on the source computer, and use Clonezilla (see instructions below) to clone all the target computers' hard drives identically. When you start these computers after the clone is complete, mini-setup will run, allowing you to customize the installation in whatever areas you specified during Sysprep. Everything else (including installed programs) will be identical to the source computer. This can be a big time saver!


Preparing Source Computer to Execute the Sysprep Utility

  1. Install operating system and all desired applications on the source computer.
  2. Create a folder at the root of the system drive called “Sysprep”. (Ex. File path: C:\Sysprep)
  3. Insert the XP CD-ROM and browse to Support\Tools\Deploy.Cab folder, and copy all its contents to C:\Sysprep.

Creating an Answer File for the Mini-Setup

  1. Browse to the Sysprep folder you created and run Setupmgr.exe.
  2. Select “Create New” and click “Next”.
  3. Select “Sysprep setup” and click “Next”.
  4. Select the appropriate operating system, and click “Next”.
  5. Select “No, do not fully automate the installation” and click “Next”.
  6. Click through each of the settings options, filling in the blanks for the settings that you wish to automate on the Sysprep install. (For example, if the administrator password will be the same for all computers, enter it in this answer file so that the user does not have to enter it each time the Mini-Setup is run on target systems.)
  7. When you have clicked past all the Settings, click “Finish” and specify C:\Sysprep as the save location for the new answer file you have just created. Note: You must keep the answer file’s default filename and extension, Sysprep.inf; otherwise Sysprep will not read it as the answer file.
  8. Confirm that the specified location and file name are correct, then exit the Setup Manager dialog box.

Running Sysprep on the Source Computer

  1. Browse to the Sysprep folder you created and run Sysprep.exe. Click “Okay” to confirm.
  2. Check the “Use Mini-Setup” box and select “Shutdown” as the Shutdown Mode.
  3. Click the “Reseal” button.
  4. Allow Sysprep to run. When the computer has shut down, you are ready to begin the HD clone using Clonezilla or some other cloning software.

Using the Clonezilla Live CD to Clone a Hard Drive & Complete Mini-Setup

Note: A free Clonezilla ISO image is available for download here.

  1. Plug an external hard drive (of equal or larger capacity to the source computer HD) into the source computer, and power on.
  2. Insert Clonezilla Live CD-ROM into the source computer, and reboot.
  3. Wait for the computer to automatically boot from the CD-ROM.
  4. Hit “Enter” to select “Clonezilla Live (Default settings, VGA 800x600)”. Wait for the scripts to finish running. Do not hit any keys during this time.
  5. Hit “Enter” to accept en_US.UTF-8 English.
  6. Select “Don’t touch keymap” and hit “Enter”.
  7. Hit “Enter” to start Clonezilla.
  8. Select “device-device disk/partition to disk/partition” and hit “Enter.”
  9. Hit “Enter” to choose the disk to local disk clone.
  10. Use the arrow keys to choose the source computer’s hard drive as the source disk, and hit “Enter”. Important: Choosing the wrong hard drive will wipe the source computer and clone it as the empty external hard drive disk instead. Make sure you are selecting the source disk.
  11. Use the arrow keys to choose the external hard drive as the target disk.
  12. Hit enter to accept the default parameters (-g-auto and -r).
  13. Select “Use the partition table from source disk” and hit “Enter.”
  14. Type “y” and hit enter…do this each time you are prompted to confirm an action (4 times total). Allow the clone to complete. (This should only take a few minutes.)
  15. Press “enter” to continue when prompted.
  16. Type “1” to reboot and hit “Enter.” Eject the CD-ROM when prompted, and press “Enter”.
  17. When the computer boots, mini-setup will begin. Fill in the required information (computer name, admin password, etc) to customize the installation.
  18. Take the external hard drive (which is now identical to the source disk) and plug it into the first target computer.
  19. Insert Clonezilla Live CD-ROM into the target computer and boot.
  20. Complete steps 4-17 on the target computer, making sure that on step 10 you choose the external hard drive as the source disk.

Friday, August 22, 2008

In Progress

Stay tuned for first installment.